There's a new weekly prompt up very apropos to the month: April Showers Water Favorite Flowers. This month's thought is 'Reach Out and 'Touch' Someone. Reminds me of the commercial, how about you?
I promised a tutorial on making inchie books. Here it is...
Materials:
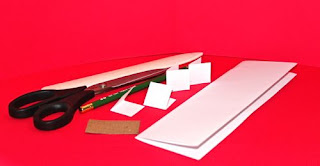
Ruler Scissors
Pencil Stick glue
Tacky glue Lightweight cardboard (like cereal box)
20 weight white paper Decorative paper
Optional:
Mod Podge & Brush Bone Folder
Procedure:
Using a ruler (a see through ruler makes it easier to measure) cut a piece of light weight cardboard 7/8 inch by 1 & 7/8 inches. This is the template for the pages. (Note: You can cut a piece 1 inch by 2 inches and then trim off 1/8 inch on one long side and one short side.)
Fold the piece of 20 weight paper in half widethwise and then in half again. (See above image) Crease folds. Using the template, cut the pages (four at a time) beginning at the bottom of the paper and continuing upwards.
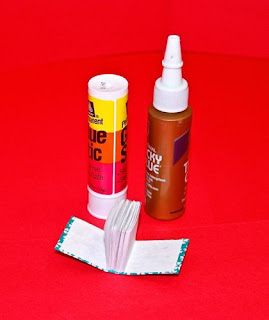
Fold the pages in half. Using stick glue, glue the pages together. Outside of one folded piece to the outside on another folded piece until all are glued together. Stick glue works best here. Liquid type glue distorts pages. One reason to glue pages together is for strength.
Glue as many 'pages' together to make the size book you want.
Spread tacky glue on the spine of the book (The folded edges that are glued together) and let dry.
To make the cover, cut a piece of cardboard (light weight) 1 inch by 3 inches. Measure one inch from one edge. Using the pencil, score the line and bend toward the line.
Place the pages in the book cover, and mark the line where the spine ends. Again score that line.
Then measure one inch from that line and cut off the remaining cardboard.
Using a piece of decorative paper, trim around the book cover.
Using stick glue, first cover the side of the cardboard which is the outside completely with glue. Place on the wrong side of the decorative paper. Now fold the decorative paper to cover the inside of the cardboard cover and glue down securely.
Optional: Using a brush, coat the cover with Mod Podge to protect the cover. That's it. Your book is done. It's easy. It's inexpensive. And it's fun. Why not try one!
Tomorrow, I'll update on how my 2013 plans are coming along...some good and some not so great.
Thanks for visiting...
Enjoy yourself...


